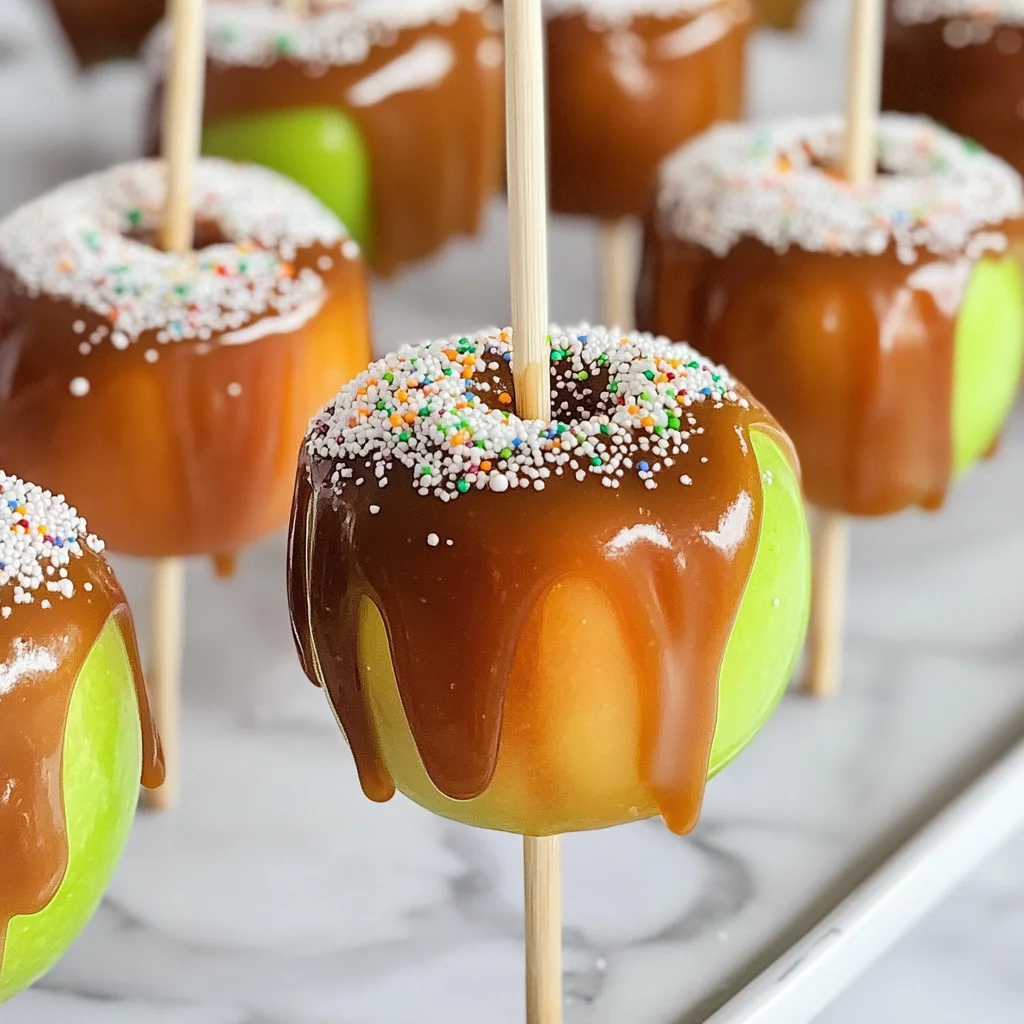
Simple caramel apples take a humble fruit and give it a sophisticated upgrade for a delightfully decadent and festive treat. Whether you’re celebrating Halloween, hosting a party, or just looking for a fun dessert to enjoy, How to Make Caramel Apples offers an easy and delicious way to impress your guests. These treats are not only visually appealing but also customizable with various toppings.

Jump to:
- Why You’ll Love This Recipe
- Tools and Preparation
- Essential Tools and Equipment
- Importance of Each Tool
- Ingredients
- For the Caramel Apples
- How to Make How to Make Caramel Apples
- Step 1: Prepare Your Apples
- Step 2: Chill the Apples
- Step 3: Melt the Caramel
- Step 4: Dip Your Apples
- Step 5: Set Your Caramel Apples
- Step 6: Enjoy!
- How to Serve How to Make Caramel Apples
- Classic Presentation
- Sliced Caramel Apples
- Dipped in Chocolate
- Topped with Treats
- Caramel Apple Bar
- How to Perfect How to Make Caramel Apples
- Best Side Dishes for How to Make Caramel Apples
- Common Mistakes to Avoid
- Storage & Reheating Instructions
- Refrigerator Storage
- Freezing How to Make Caramel Apples
- Reheating How to Make Caramel Apples
- Frequently Asked Questions
- How to Make Caramel Apples without Gelatin?
- Can I use other types of apples?
- What toppings work best on Caramel Apples?
- How long do homemade caramel apples last?
- Final Thoughts
- 📖 Recipe Card
Why You’ll Love This Recipe
- Easy to Make – With just a few simple steps, you can create these delightful treats in under two hours.
- Customizable Toppings – Use sprinkles, chopped nuts, or melted chocolate to make your caramel apples uniquely yours.
- Perfect for Any Occasion – Whether it’s a holiday gathering or a casual snack, caramel apples fit right in.
- Kid-Friendly Activity – Involve the kids in the dipping process for a fun family activity.
- Deliciously Indulgent – The rich caramel coating combined with fresh apples creates an irresistible flavor.
Tools and Preparation
Before diving into the delicious world of caramel apples, ensure you have the right tools on hand. Having everything prepared will make the process smooth and enjoyable.
Essential Tools and Equipment
- Double boiler or medium pot
- Parchment paper
- Baking sheet
- Refrigerator
Importance of Each Tool
- Double boiler or medium pot – Essential for melting caramels evenly without burning them.
- Parchment paper – Prevents caramel apples from sticking to surfaces while cooling.
- Baking sheet – Provides a stable surface for assembling and refrigerating your treats.
Ingredients
Simple caramel apples take a humble fruit and give it a sophisticated upgrade for a delightfully decadent and festive treat.
For the Caramel Apples
- 6 skewers or popsicle sticks
- 6 apples (Granny Smith, Fuji, or Honeycrisp)
- 1 (11-ounce) bag Brach’s Milk Maid caramels (unwrapped)
- 3 tablespoons water
- Melted white chocolate candy coating (optional)
- Sprinkles, chopped nuts, crushed candy (optional)
How to Make How to Make Caramel Apples
Step 1: Prepare Your Apples
- Wash apples thoroughly under running water and let them dry completely. This step is crucial as it helps remove any wax on the apple skin, allowing the caramel to stick better.
- Remove the apple stems gently and insert skewers or popsicle sticks about 1–2 inches into each apple.
Step 2: Chill the Apples
- Arrange the prepared apples on a parchment paper-lined baking sheet.
- Refrigerate for 1–2 hours to help set them before dipping.
Step 3: Melt the Caramel
- In the top of a double boiler or in a medium pot over low heat, combine unwrapped caramels and water.
- Stir continuously until the caramels are fully melted and reach about 240°F. This should take about 12–14 minutes.
Step 4: Dip Your Apples
- Once the caramel is ready, hold an apple by its stick.
- Tilt the pot at an angle and swirl each apple in the melted caramel until fully coated.
- Gently tap each apple to let excess caramel drip off before placing it back onto the parchment paper.
Step 5: Set Your Caramel Apples
- After dipping all apples in caramel, refrigerate again for about 30 minutes until set.
- If desired, dip your cooled apples in melted white chocolate candy coating or add your favorite toppings like sprinkles or chopped nuts.
Step 6: Enjoy!
- Store caramel apples in the refrigerator but remember to remove them at least 30 minutes before serving for optimal taste.
These delightful treats are perfect for sharing with friends and family! Enjoy your homemade caramel apples!
How to Serve How to Make Caramel Apples
Caramel apples are versatile treats that can be enjoyed in various delightful ways. Here are some serving suggestions to enhance your caramel apple experience.
Classic Presentation
- Serve whole caramel apples on a decorative platter for a traditional look.
Sliced Caramel Apples
- Slice the caramel apples into wedges for easy sharing, making them perfect for parties or events.
Dipped in Chocolate
- For an extra indulgence, dip the set caramel apples in melted white chocolate and let it harden before serving.
Topped with Treats
- Add sprinkles, chopped nuts, or crushed candy on the caramel before it sets to create unique flavor combinations.
Caramel Apple Bar
- Set up a DIY station with various toppings so guests can customize their own caramel apples.
How to Perfect How to Make Caramel Apples
Creating flawless caramel apples is all about technique and preparation. Here are some tips to ensure your caramel apples turn out perfectly every time.
- Choose the right apples: Use crisp varieties like Granny Smith, Fuji, or Honeycrisp for the best texture and flavor.
- Dry thoroughly: Ensure that your washed apples are completely dry to help the caramel adhere better.
- Use a double boiler: Melting caramels in a double boiler provides gentle heat, preventing burning and ensuring smooth consistency.
- Cool before topping: Allow your dipped apples to cool at room temperature before adding any coatings or toppings.
- Store properly: Keep your caramel apples refrigerated but let them sit at room temperature for 30 minutes before serving for optimal taste and texture.
Best Side Dishes for How to Make Caramel Apples
Pairing side dishes with your caramel apples can create a balanced and satisfying dessert spread. Here are some delightful options.
Cheese Platter
A selection of cheeses complements the sweetness of caramel apples beautifully. Consider adding sharp cheddar or creamy brie.Fruit Salad
A fresh fruit salad offers a refreshing contrast to the rich flavor of the caramel. Choose seasonal fruits for variety.Nut Mix
Serve a mix of roasted nuts as a crunchy side that pairs well with the softness of the caramel apple.Mini Pretzels
The salty crunch of mini pretzels provides a delicious counterbalance to the sweet flavors of the dessert.Yogurt Parfait
Layer yogurt with granola and fresh fruit for a light side that is both nutritious and satisfying alongside sweets.Popcorn Mix
Create a popcorn mix using sweet and savory elements like kettle corn mixed with seasoned popcorn for an exciting texture combination.
Common Mistakes to Avoid
Making caramel apples can be simple, but there are a few common pitfalls that can lead to less-than-perfect results. Here are some mistakes to watch out for:
Skipping the apple wash: Not washing your apples can leave a waxy coating that prevents the caramel from sticking properly. Always wash and dry them thoroughly before starting.
Using cold apples: Starting with cold apples can cause the caramel to harden quickly. Make sure your apples are at room temperature for better adhesion.
Overheating caramel: Cooking caramel too long or at too high a temperature can burn it. Keep an eye on it and stir constantly until it reaches the right consistency.
Dipping too quickly: Rushing the dipping process can lead to uneven coating. Take your time, swirl the apple gently in the caramel, and let excess drip off before placing it down.
Not refrigerating enough: Failing to chill your dipped apples can result in sticky fingers and melted caramel. Refrigerate them until the caramel sets properly.
Storage & Reheating Instructions
Refrigerator Storage
- Store in an airtight container to keep them fresh.
- They will last up to 5 days in the refrigerator.
- Place parchment paper between layers if stacking.
Freezing How to Make Caramel Apples
- Wrap each apple individually in plastic wrap before freezing.
- They can be frozen for up to 2 months.
- Allow them to thaw in the refrigerator overnight before serving.
Reheating How to Make Caramel Apples
- Oven: Preheat to 200°F and warm for 5-10 minutes. This helps soften any hardened caramel.
- Microwave: Heat on low power for 10-15 seconds at a time, checking frequently.
- Stovetop: Use a double boiler with water simmering, and place apples in a bowl above it for gentle warming.
Frequently Asked Questions
If you’re curious about making caramel apples, check out these common questions:
How to Make Caramel Apples without Gelatin?
You don’t need gelatin! Use Brach’s Milk Maid caramels which melt beautifully without any gelatin.
Can I use other types of apples?
Yes! Granny Smith, Fuji, or Honeycrisp are great options due to their crisp texture and balance of sweetness and tartness.
What toppings work best on Caramel Apples?
You can get creative! Try sprinkles, crushed nuts, or even melted chocolate for added flavor and texture.
How long do homemade caramel apples last?
Homemade caramel apples will typically last about 5 days when stored properly in the refrigerator.
Final Thoughts
Caramel apples are a delightful treat that combines fresh fruit with rich sweetness. Their versatility allows you to customize them with various toppings or coatings. Don’t hesitate to experiment and make this recipe your own!
Did You Enjoy Making This Recipe? Please rate this recipe with ⭐⭐⭐⭐⭐ or leave a comment.
📖 Recipe Card
Print
Caramel Apples
- Total Time: 35 minutes
- Yield: Makes 6 servings 1x
Description
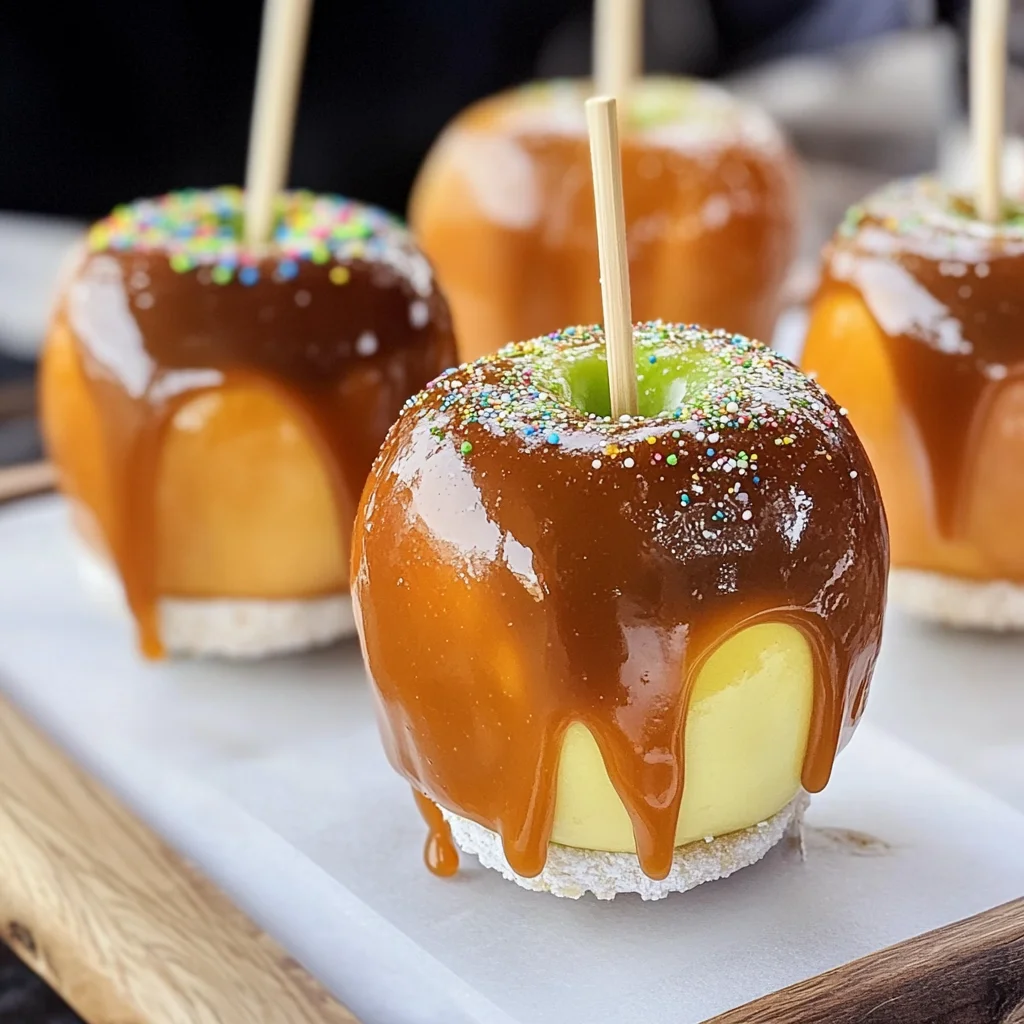
Indulge in the sweet joy of homemade caramel apples, a timeless treat that elevates fresh fruit into a delightful dessert. Perfect for any occasion—from festive gatherings to simple family snacks—these caramel-coated beauties are sure to impress. With customizable toppings like sprinkles and nuts, you can create a unique flavor experience that will please both kids and adults alike. Plus, making caramel apples is a fun activity to enjoy together as a family, providing both delicious results and cherished memories.
Ingredients
- 6 skewers or popsicle sticks
- 6 apples (Granny Smith, Fuji, or Honeycrisp)
- 1 (11-ounce) bag Brach’s Milk Maid caramels (unwrapped)
- 3 tablespoons water
- Optional: melted white chocolate candy coating, sprinkles, chopped nuts, or crushed candy
Instructions
- Thoroughly wash and dry the apples; remove stems and insert skewers.
- Place prepared apples on a parchment-lined baking sheet and refrigerate for 1–2 hours.
- Melt caramels with water in a double boiler over low heat until smooth.
- Dip each apple into the caramel; let excess drip off before placing back on parchment.
- Refrigerate again for 30 minutes to set. Optionally dip in melted white chocolate and add toppings.
- Prep Time: 20 minutes
- Cook Time: 15 minutes
- Category: Dessert
- Method: Baking
- Cuisine: American
Nutrition
- Serving Size: 1 apple (approximately 139g)
- Calories: 240
- Sugar: 34g
- Sodium: 80mg
- Fat: 7g
- Saturated Fat: 4g
- Unsaturated Fat: 3g
- Trans Fat: 0g
- Carbohydrates: 41g
- Fiber: 3g
- Protein: 1g
- Cholesterol: 0mg