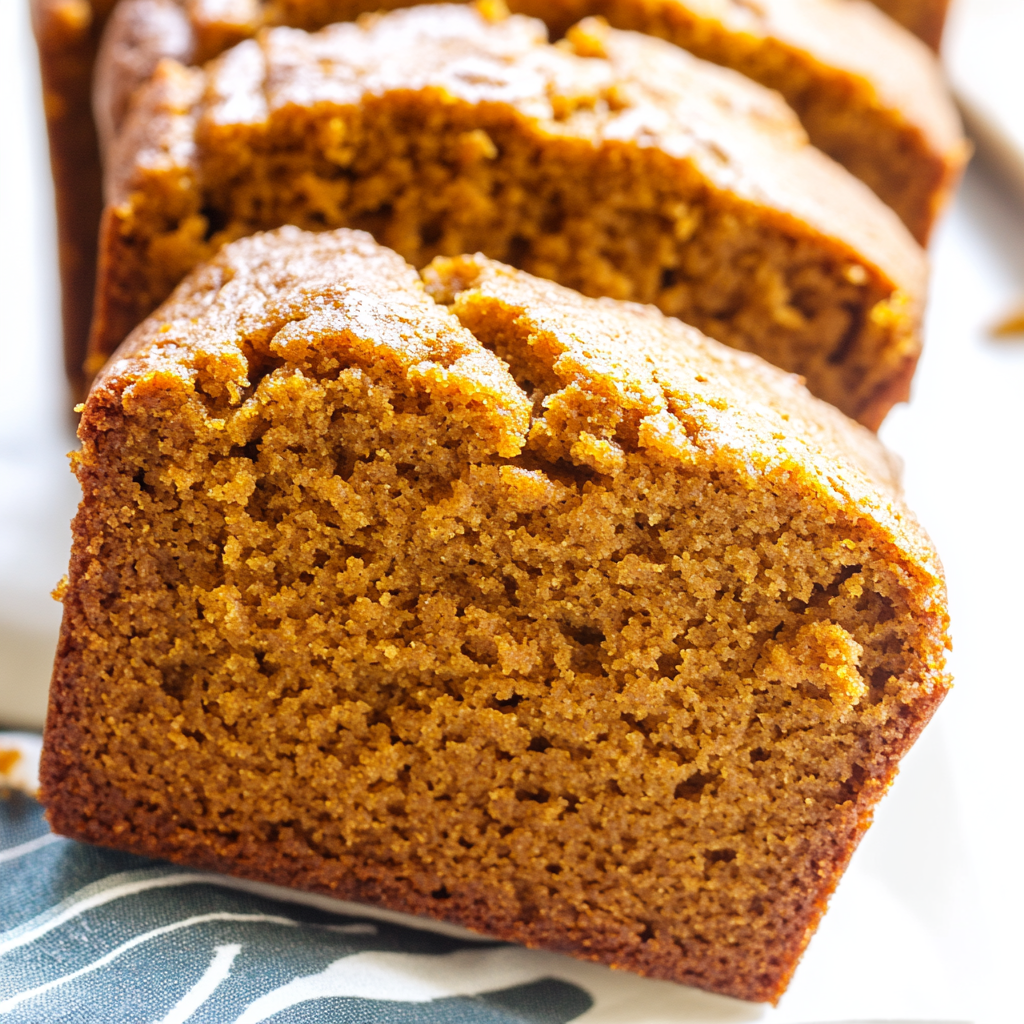
Gluten-Free Pumpkin Bread is the perfect treat for any fall occasion. This delightful quick bread is not only spiced with cinnamon, nutmeg, and cloves but also offers a wonderfully moist texture that your family will love. Whether you’re hosting a gathering or simply looking to enjoy a cozy snack, this gluten-free pumpkin bread is sure to impress everyone at your table.
Jump to:
- Why You’ll Love This Recipe
- Tools and Preparation
- Essential Tools and Equipment
- Importance of Each Tool
- Ingredients
- For the Bread
- How to Make Gluten-Free Pumpkin Bread
- Step 1: Preheat the Oven
- Step 2: Prepare the Dry Ingredients
- Step 3: Combine Wet Ingredients
- Step 4: Combine Dry and Wet Mixtures
- Step 5: Bake the Loaves
- Step 6: Cool and Serve
- How to Serve Gluten-Free Pumpkin Bread
- With Cream Cheese Spread
- Warm with Butter
- Topped with Honey or Maple Syrup
- Served with Coffee or Tea
- Accompanied by Fresh Fruit
- As a Dessert with Whipped Coconut Cream
- How to Perfect Gluten-Free Pumpkin Bread
- Best Side Dishes for Gluten-Free Pumpkin Bread
- Common Mistakes to Avoid
- Storage & Reheating Instructions
- Refrigerator Storage
- Freezing Gluten-Free Pumpkin Bread
- Reheating Gluten-Free Pumpkin Bread
- Frequently Asked Questions
- What makes this Gluten-Free Pumpkin Bread different?
- Can I use other flours in this Gluten-Free Pumpkin Bread recipe?
- How do I know when my Gluten-Free Pumpkin Bread is done baking?
- Can I add nuts or seeds to my Gluten-Free Pumpkin Bread?
- Is this Gluten-Free Pumpkin Bread dairy-free?
- Final Thoughts
- 📖 Recipe Card
Why You’ll Love This Recipe
- Easy to Make – With simple ingredients and straightforward steps, you can whip up this delicious bread in no time.
- Flavor Packed – The combination of spices delivers a warm and inviting flavor, making it a perfect choice for fall.
- Versatile Serving Options – Enjoy it as a breakfast treat, an afternoon snack, or even as a dessert.
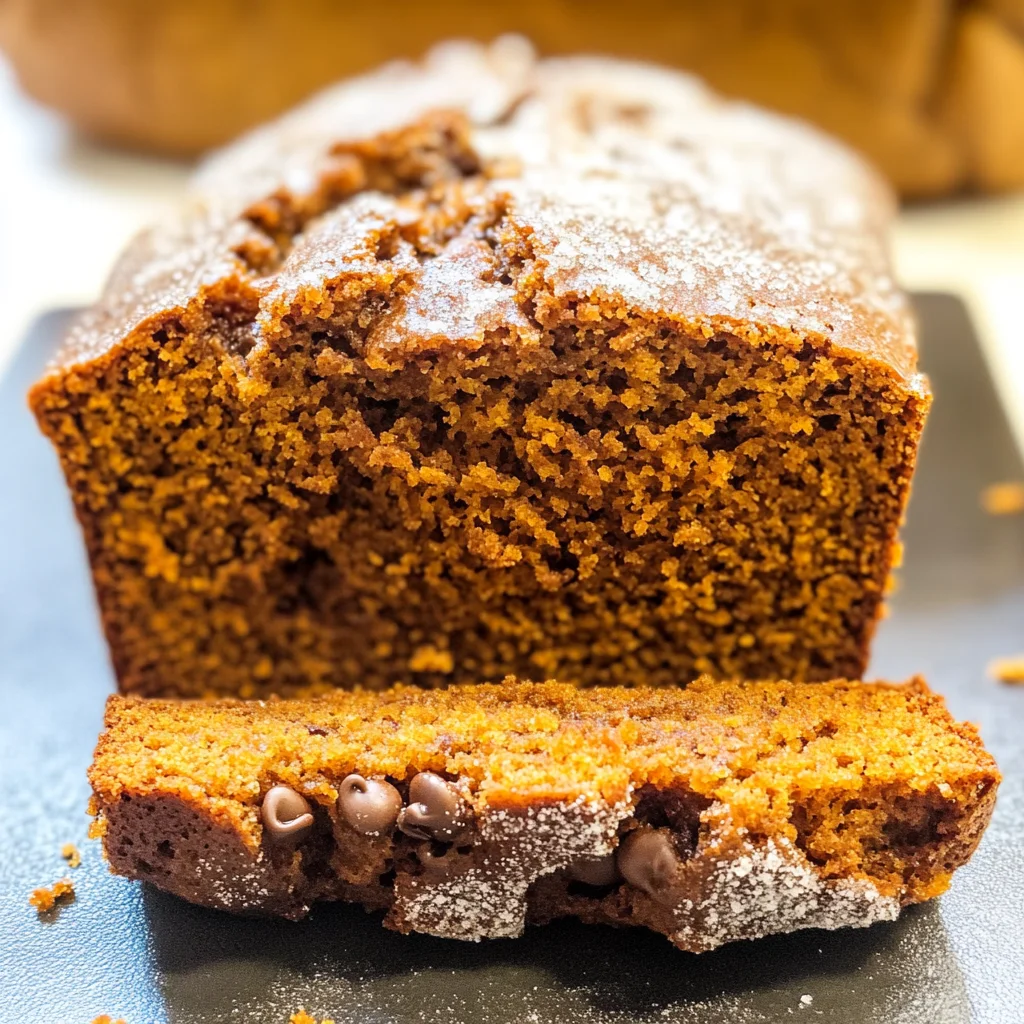
- Customizable Ingredients – Feel free to add nuts or gluten-free chocolate chips for an extra special touch.
- Great for Meal Prep – Bake a batch ahead of time and store it for busy days; it freezes beautifully!
Tools and Preparation
Before you begin baking, gather your tools and ensure you have everything on hand. Having the right equipment makes the process smoother and more enjoyable.
Essential Tools and Equipment
- Mixing bowls
- Measuring cups
- Whisk
- Spatula
- Loaf pans
Importance of Each Tool
- Mixing bowls – Essential for combining dry and wet ingredients without spilling.
- Measuring cups – Accurate measurements are key to successful baking; they ensure the right proportions.
- Whisk – Perfect for blending ingredients smoothly, especially when incorporating eggs into the mixture.
- Loaf pans – The correct size matters to achieve even baking; choose pans that fit your recipe.

Ingredients
For the Bread
- 3 1/2 cups gluten-free flour (I use Bob’s Red Mill 1-to-1 gluten free flour)
- 2 teaspoons baking soda
- 1/2 teaspoon salt
- 1 teaspoon cinnamon
- 1 teaspoon nutmeg
- 1 teaspoon ground cloves
- 4 eggs
- 2/3 cup water
- 2 cups pumpkin (I use canned pumpkin. Make sure that it is gluten-free if you are intolerant)
- 2 cups sugar
- 1 cup brown sugar
- 1 cup oil
- 1 cup gluten-free chocolate chips (optional)
How to Make Gluten-Free Pumpkin Bread
Step 1: Preheat the Oven
Preheat your oven to 350°F. Grease three 8-inch loaf pans or two larger loaf pans with oil or cooking spray.
Step 2: Prepare the Dry Ingredients
In a mixing bowl, combine all dry ingredients:
1. Add the gluten-free flour, baking soda, salt, cinnamon, nutmeg, and ground cloves.
2. Mix well until combined and set aside.
Step 3: Combine Wet Ingredients
In another bowl:
1. Combine eggs, water, pumpkin puree, sugar, brown sugar, and oil.
2. Mix until everything is well blended.
Step 4: Combine Dry and Wet Mixtures
Gradually add the dry mixture into the wet ingredients:
1. Stir until no dry flour remains visible. The batter will be thick but that’s normal.
Step 5: Bake the Loaves
Pour the batter evenly into your prepared loaf pans:
1. Bake at 350°F for about 60 minutes.
2. Check doneness by inserting a toothpick into the center; it should come out clean.
Step 6: Cool and Serve
Let the loaves cool in the pans for about 10 minutes before transferring them to wire racks to cool completely. Enjoy your freshly baked Gluten-Free Pumpkin Bread!
How to Serve Gluten-Free Pumpkin Bread
Serving gluten-free pumpkin bread can enhance its delightful flavors and create a comforting experience for everyone at the table. Whether you prefer it warm or cold, there are numerous ways to enjoy this delicious fall treat.
With Cream Cheese Spread
- A smooth cream cheese spread adds a rich, tangy flavor that pairs perfectly with the spices in the bread.
Warm with Butter
- Spread a pat of butter on warm slices for a simple yet satisfying option. The butter melts into the bread, enhancing its moist texture.
Topped with Honey or Maple Syrup
- Drizzle honey or maple syrup over your pumpkin bread for a touch of sweetness that complements its natural flavors beautifully.
Served with Coffee or Tea
- Enjoy a slice alongside your favorite hot beverage. The warmth of coffee or tea balances the richness of the bread, making it an ideal morning or afternoon snack.
Accompanied by Fresh Fruit
- Slices of apple or pear add freshness and crunch. This combination creates a delightful contrast to the soft texture of the pumpkin bread.
As a Dessert with Whipped Coconut Cream
- For a dairy-free dessert option, top your pumpkin bread with whipped coconut cream. It adds a light, airy touch that complements the dense loaf beautifully.
How to Perfect Gluten-Free Pumpkin Bread
Perfecting gluten-free pumpkin bread is all about balancing flavors and achieving the right texture. Here are some tips to help you master this recipe.
- Use Fresh Spices: Ensure your cinnamon, nutmeg, and cloves are fresh for maximum flavor impact.
- Check Flour Blend: Different gluten-free blends behave differently; choose one known for baking to achieve the best texture.
- Don’t Overmix: Mix just until combined to avoid dense bread; overmixing can lead to a tougher loaf.
- Monitor Baking Time: Keep an eye on your loaves as baking times may vary between ovens; check doneness with a toothpick.
- Store Properly: To keep it fresh longer, store leftover bread in an airtight container at room temperature for up to three days.
- Experiment with Add-Ins: Try adding nuts or seeds for added texture and flavor variety in each bite.
Best Side Dishes for Gluten-Free Pumpkin Bread
Pairing side dishes with gluten-free pumpkin bread can elevate your meal experience. Here are some fantastic options that complement its flavors well.
- Mixed Green Salad
A light salad with vinaigrette provides a refreshing balance to the sweetness of the pumpkin bread. - Roasted Vegetables
Caramelized roasted vegetables bring out sweet notes that harmonize beautifully with the spiced loaf. - Creamy Mashed Potatoes
The smoothness of mashed potatoes offers a comforting contrast to the textured pumpkin bread. - Vegetable Soup
A bowl of hearty vegetable soup makes for a warm and satisfying pairing, especially on cooler days. - Coleslaw
A tangy coleslaw can brighten up your plate and offer crunch against the soft bread texture. - Fruit Salad
A mix of seasonal fruits adds brightness and freshness that elevates each bite of pumpkin goodness. - Sweet Potato Fries
These crispy fries add crunch and pair nicely without overpowering the flavors of your pumpkin bread. - Cheese Platter
Include mild cheeses like brie or goat cheese that provide creaminess without overwhelming taste—perfect for snacking alongside slices of pumpkin bread!
Common Mistakes to Avoid
When making Gluten-Free Pumpkin Bread, it’s important to avoid common pitfalls that could affect the texture and flavor of your bread.
- Not measuring flour correctly – Using too much or too little gluten-free flour can lead to a dense loaf. Always measure flour using the spoon and level method for accuracy.
- Skipping the spices – Omitting spices like cinnamon, nutmeg, and cloves can result in a bland bread. Ensure you include these spices for that warm fall flavor.
- Baking at the wrong temperature – Baking at an incorrect temperature can cause uneven cooking. Use an oven thermometer to confirm your oven’s temperature is accurate before baking.
- Overmixing the batter – Mixing the batter too much can lead to tough bread. Mix until just combined; it’s okay if there are a few lumps.
- Not checking for doneness – Relying solely on baking time can be misleading. Always test with a toothpick in the center of your loaf to ensure it comes out clean.
Storage & Reheating Instructions
Refrigerator Storage
- Store in an airtight container for up to 5 days.
- Place parchment paper between slices to prevent sticking.
Freezing Gluten-Free Pumpkin Bread
- Wrap tightly in plastic wrap and then in aluminum foil for up to 3 months.
- Label with the date for easy identification when frozen.
Reheating Gluten-Free Pumpkin Bread
- Oven – Preheat to 350°F (175°C) and heat slices for about 10 minutes until warm.
- Microwave – Microwave individual slices for about 15-20 seconds until heated through.
- Stovetop – Heat slices in a non-stick pan over low heat for about 2-3 minutes on each side until warmed.
Frequently Asked Questions
Here are some common questions about Gluten-Free Pumpkin Bread that may help you perfect your recipe.
What makes this Gluten-Free Pumpkin Bread different?
This Gluten-Free Pumpkin Bread is made with gluten-free flour, making it suitable for those avoiding gluten while still delivering rich pumpkin flavor.
Can I use other flours in this Gluten-Free Pumpkin Bread recipe?
You can experiment with different gluten-free flours, but make sure they have similar properties as those used in the original recipe for best results.
How do I know when my Gluten-Free Pumpkin Bread is done baking?
Insert a toothpick into the center of the loaf; if it comes out clean, your bread is ready!
Can I add nuts or seeds to my Gluten-Free Pumpkin Bread?
Absolutely! Adding nuts or seeds will give your bread extra texture and flavor. Just mix them into the batter before baking.
Is this Gluten-Free Pumpkin Bread dairy-free?
Yes! This recipe does not contain any dairy products, making it suitable for those following dairy-free diets.
Final Thoughts
Gluten-Free Pumpkin Bread is a delightful treat that combines warm spices and pumpkin flavors perfect for fall. Its versatility allows you to customize it with chocolate chips or nuts. Whether enjoyed fresh or toasted, this recipe is sure to become a family favorite. Try it today!
Did You Enjoy Making This Recipe? Please rate this recipe with ⭐⭐⭐⭐⭐ or leave a comment.
📖 Recipe Card
Print
Gluten-Free Pumpkin Bread
- Total Time: 1 hour 15 minutes
- Yield: Serves approximately 12 slices 1x
Description
Indulge in the flavors of fall with our delightful Gluten-Free Pumpkin Bread. This moist, spiced quick bread is perfect for any occasion, whether you’re hosting friends or enjoying a cozy day at home. Infused with warm notes of cinnamon, nutmeg, and cloves, each bite brings a comforting taste that your family will adore. Easy to prepare and customizable with nuts or gluten-free chocolate chips, this recipe makes meal prep a breeze. Plus, it freezes beautifully—so you can savor the essence of autumn anytime!
Ingredients
- 3 1/2 cups gluten-free flour
- 2 teaspoons baking soda
- 1/2 teaspoon salt
- 1 teaspoon cinnamon
- 1 teaspoon nutmeg
- 1 teaspoon ground cloves
- 4 eggs
- 2/3 cup water
- 2 cups pumpkin puree
- 2 cups sugar
- 1 cup brown sugar
- 1 cup oil
- 1 cup gluten-free chocolate chips (optional)
Instructions
- Preheat your oven to 350°F (175°C). Grease three 8-inch loaf pans or two larger loaf pans.
- In a mixing bowl, whisk together gluten-free flour, baking soda, salt, and spices until well combined.
- In another bowl, mix eggs, water, pumpkin puree, sugars, and oil until smooth.
- Gradually fold the dry mixture into the wet ingredients until just combined; avoid overmixing.
- Divide the batter evenly among the prepared loaf pans and bake for about 60 minutes or until a toothpick comes out clean.
- Allow to cool in pans for 10 minutes before transferring to wire racks.
- Prep Time: 15 minutes
- Cook Time: 60 minutes
- Category: Dessert
- Method: Baking
- Cuisine: American
Nutrition
- Serving Size: 1 slice (70g)
- Calories: 250
- Sugar: 22g
- Sodium: 150mg
- Fat: 11g
- Saturated Fat: 1g
- Unsaturated Fat: 9g
- Trans Fat: 0g
- Carbohydrates: 35g
- Fiber: 2g
- Protein: 3g
- Cholesterol: 0mg