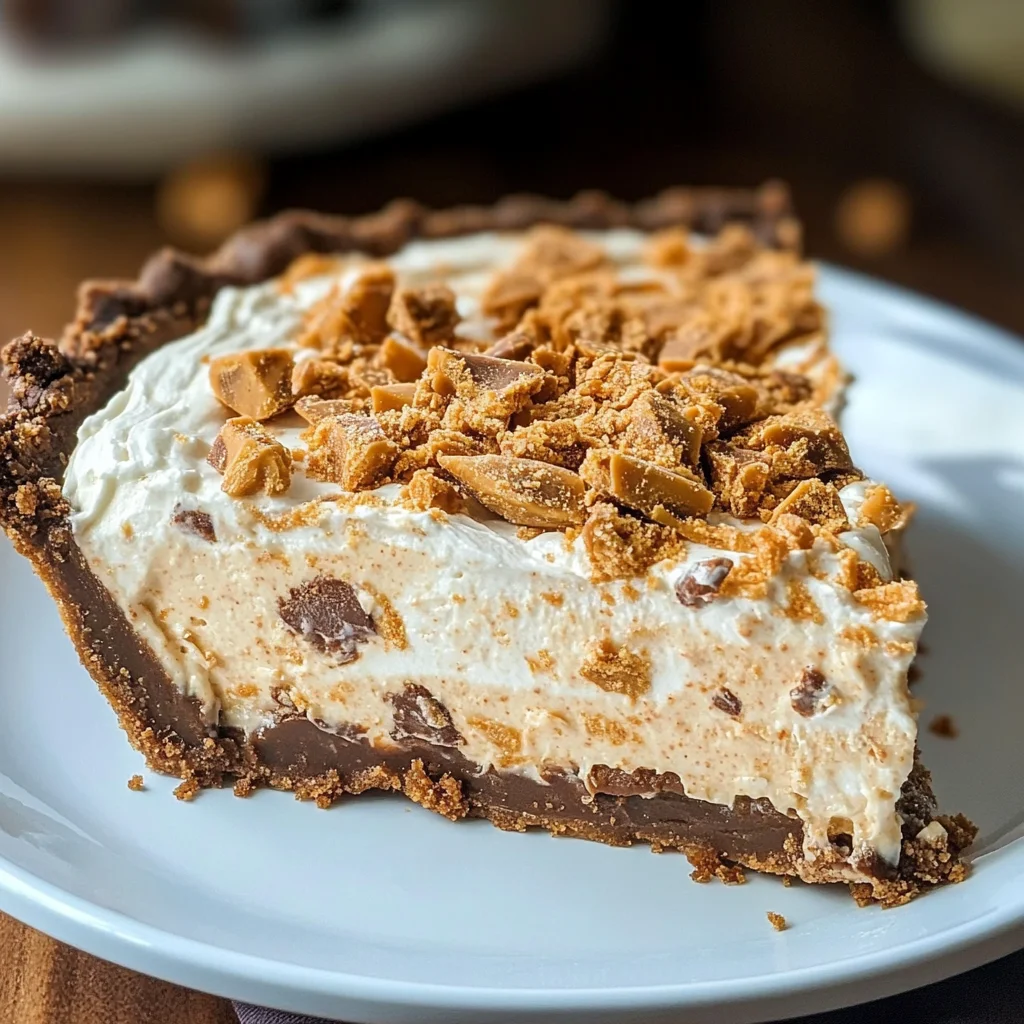
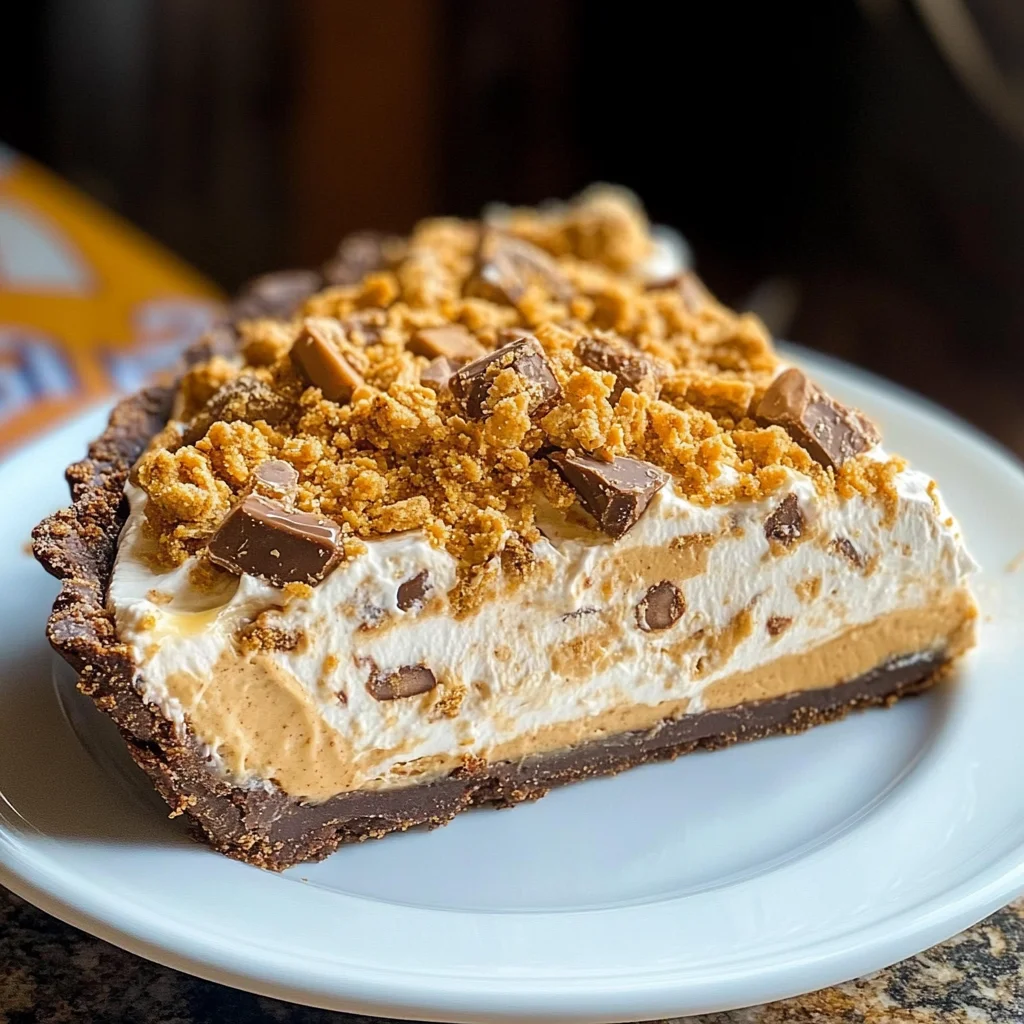
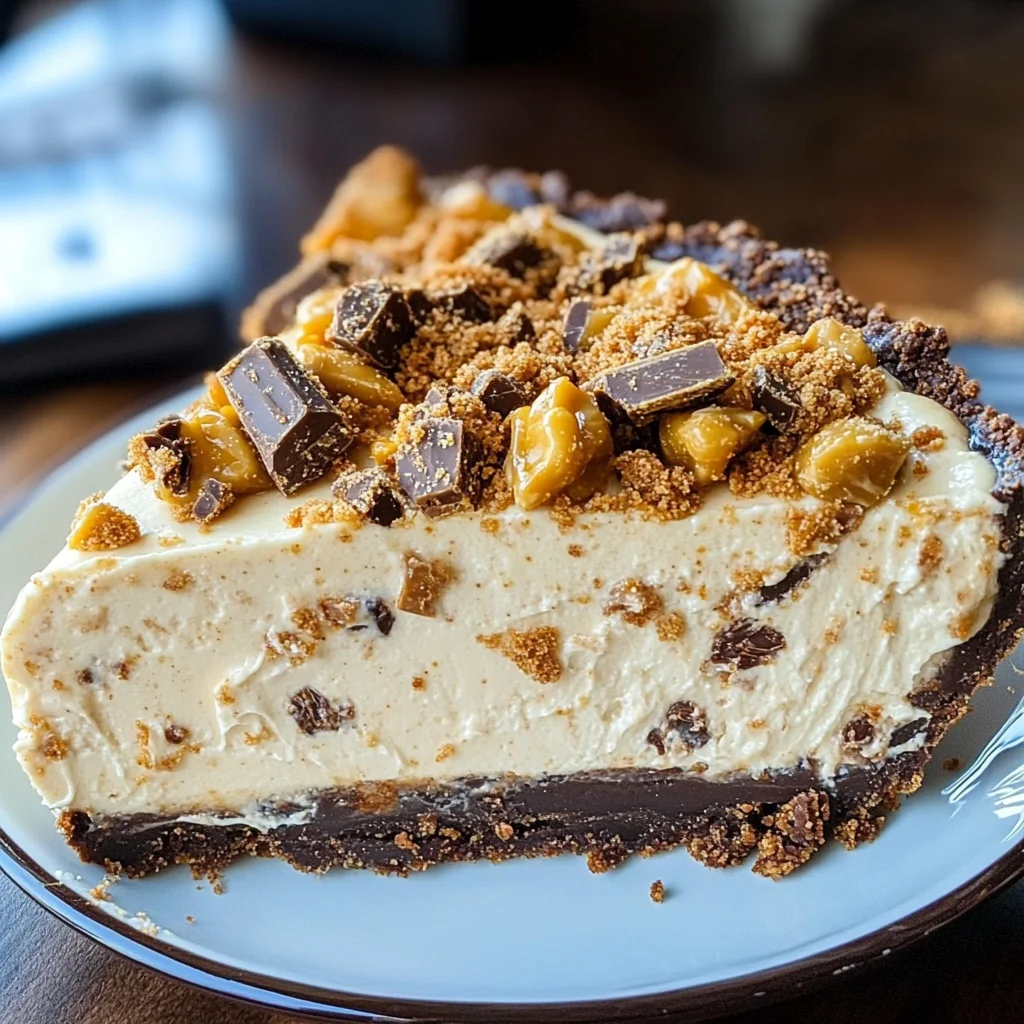
This cool and creamy Butterfinger Pie is the stuff dreams are made of. It’s a no-bake dessert that’s incredibly easy to make, making it perfect for family gatherings, potlucks, or simply satisfying your sweet tooth. The combination of creamy peanut butter and crunchy Butterfinger bars creates a delightful texture that sets this dessert apart. Plus, it’s a crowd-pleaser that everyone will love!
Jump to:
- Why You’ll Love This Recipe
- Tools and Preparation
- Essential Tools and Equipment
- Importance of Each Tool
- Ingredients
- For the Filling
- For the Crust
- How to Make Butterfinger Pie
- Step 1: Prepare the Filling
- Step 2: Add Sweetness
- Step 3: Mix in Crunchy Goodness
- Step 4: Incorporate Whipped Topping
- Step 5: Assemble the Pie
- Step 6: Chill Before Serving
- How to Serve Butterfinger Pie
- Individual Servings
- With Fresh Fruit
- Accompanied by Coffee or Tea
- As Part of a Dessert Buffet
- How to Perfect Butterfinger Pie
- Best Side Dishes for Butterfinger Pie
- Common Mistakes to Avoid
- Storage & Reheating Instructions
- Refrigerator Storage
- Freezing Butterfinger Pie
- Reheating Butterfinger Pie
- Frequently Asked Questions
- What is Butterfinger Pie?
- How long does it take to make Butterfinger Pie?
- Can I customize my Butterfinger Pie?
- Is Butterfinger Pie gluten-free?
- Final Thoughts
- 📖 Recipe Card
Why You’ll Love This Recipe
- No-Bake Convenience: This recipe requires no baking, making it simple and quick to prepare.
- Delicious Flavor: The combination of cream cheese and peanut butter offers a rich, creamy taste paired with the crunch of Butterfinger.
- Versatile Dessert: Great for various occasions like birthdays, holidays, or casual get-togethers.
- Kid-Friendly: Kids will love helping to crush the Butterfinger bars and layering the pie!
- Make-Ahead Friendly: Prepare in advance; just refrigerate until you’re ready to serve.
Tools and Preparation
To make this delicious Butterfinger Pie, you’ll need some essential tools for the best results.
Essential Tools and Equipment
- Electric mixer
- Mixing bowl
- Rubber spatula
- Measuring cups
- Measuring spoons
- Pie dish
Importance of Each Tool
- Electric mixer: Ensures a smooth and creamy filling by thoroughly blending ingredients.
- Mixing bowl: Provides ample space for combining all ingredients without spills.
- Rubber spatula: Perfect for folding in delicate ingredients like Cool Whip without deflating them.
Ingredients
For the Filling
- 1 (8-ounce) package cream cheese (room temperature)
- 1/2 cup creamy peanut butter
- 2 teaspoons vanilla extract
- 1 1/2 cups powdered sugar
- 1 (12.5-ounce) bag fun-sized butterfinger bars (crushed, reserve 2 bars to sprinkle on top)
- 1 (8-ounce) container Cool Whip (thawed)
For the Crust
- 1 store-bought oreo or chocolate graham cracker crust
How to Make Butterfinger Pie
Step 1: Prepare the Filling
- Place cream cheese and peanut butter in a large mixing bowl.
- Add vanilla extract, and beat with an electric mixer until smooth.
Step 2: Add Sweetness
- Gradually beat in powdered sugar until fully incorporated and smooth.
Step 3: Mix in Crunchy Goodness
- Fold in the crushed Butterfinger bars, ensuring they are evenly distributed throughout the mixture.
Step 4: Incorporate Whipped Topping
- Gently fold in the Cool Whip, being careful not to deflate it.
Step 5: Assemble the Pie
- Spread the filling evenly into the prepared crust.
- Sprinkle reserved crushed Butterfinger bars on top for added crunch.
Step 6: Chill Before Serving
- Refrigerate for at least 4 hours before serving to allow it to set properly.
With these steps, you’ll have a delightful Butterfinger Pie ready to impress your friends and family!
How to Serve Butterfinger Pie
Butterfinger Pie is a delightful dessert perfect for any occasion. Its creamy texture and rich flavor make it a crowd-pleaser that pairs well with various serving options.
Individual Servings
- Serve in small cups for a fun twist on presentation.
- Pair with a dollop of whipped cream for added fluffiness.
With Fresh Fruit
- Add sliced bananas or strawberries on top for a refreshing contrast.
- Serve with a side of mixed berries for a colorful and healthy addition.
Accompanied by Coffee or Tea
- Enjoy with a hot cup of coffee to balance the sweetness.
- Pair with herbal tea for a calming after-dinner treat.
As Part of a Dessert Buffet
- Include in a dessert table selection alongside other no-bake treats.
- Create mini dessert jars to allow guests to sample multiple flavors.
How to Perfect Butterfinger Pie
To ensure your Butterfinger Pie turns out perfectly every time, consider these helpful tips.
- Use Room Temperature Ingredients: This helps the cream cheese blend smoothly without lumps.
- Don’t Overbeat the Mixture: Beat until just combined; overmixing can lead to a dense filling.
- Chill Properly: Refrigerate for at least 4 hours to allow the pie to set properly.
- Reserve Extra Toppings: Save some crushed Butterfinger bars for garnishing just before serving for added crunch.
- Experiment with Crusts: While an Oreo crust is classic, try using graham cracker or chocolate cookie crusts for different flavors.
Best Side Dishes for Butterfinger Pie
Serving Butterfinger Pie with complementary sides can elevate your dessert experience. Here are some great options:
- Chocolate Chip Cookies: Classic cookies that pair beautifully with the creamy pie.
- Vanilla Ice Cream: A scoop of vanilla ice cream adds an extra layer of creamy goodness.
- Fruit Salad: A mix of fresh fruits provides a refreshing contrast to the richness of the pie.
- Chocolate Mousse: Light and airy, this dessert enhances the chocolatey flavors of the pie.
- Pecan Pie Bars: Another sweet treat that offers nutty flavors alongside your Butterfinger Pie.
- Caramel Sauce Drizzle: A drizzle on the side adds sweetness and richness when paired with each slice.
- Mini Cheesecakes: These bite-sized treats complement the creamy texture of the pie well.
Common Mistakes to Avoid
Making Butterfinger Pie can be a breeze, but there are some common mistakes to watch out for.
- Using Cold Ingredients: Start with room temperature cream cheese. Cold cream cheese can result in a lumpy filling that doesn’t blend well.
- Overmixing the Filling: Mix just until combined. Overmixing can make the filling too airy and cause it to lose its creamy texture.
- Not Refrigerating Long Enough: Allow the pie to chill for at least 4 hours. Skipping this step means the filling won’t set properly.
- Skipping the Crust: A good crust is essential for structure. If you don’t use a crust, the filling can be too soft and messy.
- Using Unsweetened Peanut Butter: Make sure to use creamy, sweetened peanut butter. Unsweetened varieties may lead to a less enjoyable flavor.
Storage & Reheating Instructions
Refrigerator Storage
- Store leftover Butterfinger Pie in an airtight container.
- It will keep well in the fridge for up to 5 days.
Freezing Butterfinger Pie
- Wrap slices in plastic wrap or store in an airtight container.
- You can freeze the pie for up to 2 months.
Reheating Butterfinger Pie
- Oven: Preheat to 350°F (175°C) and warm for about 10 minutes. This method is not typically necessary but works if you prefer it slightly warmed.
- Microwave: Heat on medium power in short bursts of 15-20 seconds. Check frequently to avoid melting.
- Stovetop: Not recommended for this pie due to its no-bake nature.
Frequently Asked Questions
Here are some common questions about Butterfinger Pie.
What is Butterfinger Pie?
Butterfinger Pie is a no-bake dessert made with cream cheese, peanut butter, crushed Butterfinger bars, and whipped topping, all nestled in a chocolate crust.
How long does it take to make Butterfinger Pie?
This delicious pie takes only about 15 minutes of preparation time and needs at least 4 hours to chill before serving.
Can I customize my Butterfinger Pie?
Absolutely! You can add other candy bars or nuts as toppings or mix-ins for extra flavor and crunch.
Is Butterfinger Pie gluten-free?
If you use a gluten-free crust, then yes! Check package labels of your ingredients to ensure they meet your dietary needs.
Final Thoughts
Butterfinger Pie is a delightful dessert that strikes the perfect balance between creamy and crunchy. Its versatility allows for easy customization, making it ideal for gatherings or simply indulging at home. Give this recipe a try and experience its rich flavors yourself!
Did You Enjoy Making This Recipe? Please rate this recipe with ⭐⭐⭐⭐⭐ or leave a comment.
📖 Recipe Card
Print
Butterfinger Pie
- Total Time: 0 hours
- Yield: 12 servings 1x
Description
Indulge in the delightful experience of Butterfinger Pie, a cool and creamy no-bake dessert that is sure to impress at any gathering. This easy-to-make treat combines rich cream cheese with smooth peanut butter, layered with the crunch of crushed Butterfinger bars for a texture that is simply irresistible. Perfect for birthdays, holidays, or casual get-togethers, this dessert is not only delicious but also kid-friendly—allowing little ones to help crush the candy bars! With its make-ahead convenience, you’ll love how simple it is to prepare and serve this sweet delight chilled.
Ingredients
- 1 (8-ounce) package cream cheese (room temperature)
- 1/2 cup creamy peanut butter
- 2 teaspoons vanilla extract
- 1 1/2 cups powdered sugar
- 1 (12.5-ounce) bag fun-sized butterfinger bars (crushed, reserve 2 bars to sprinkle on top)
- 1 (8-ounce) container Cool Whip (thawed)
- 1 store-bought oreo or chocolate graham cracker crust
Instructions
- In a large mixing bowl, beat together cream cheese and peanut butter until smooth.
- Gradually add powdered sugar and mix until well incorporated.
- Fold in the crushed Butterfinger bars gently.
- Carefully mix in Cool Whip until combined.
- Spread filling evenly into the prepared chocolate crust and top with reserved crushed Butterfinger.
- Refrigerate for at least 4 hours before serving.
- Prep Time: 15 minutes
- Cook Time: None
- Category: Dessert
- Method: No-Bake
- Cuisine: American
Nutrition
- Serving Size: 1 slice (100g)
- Calories: 320
- Sugar: 22g
- Sodium: 180mg
- Fat: 18g
- Saturated Fat: 8g
- Unsaturated Fat: 9g
- Trans Fat: 0g
- Carbohydrates: 36g
- Fiber: 1g
- Protein: 5g
- Cholesterol: 25mg