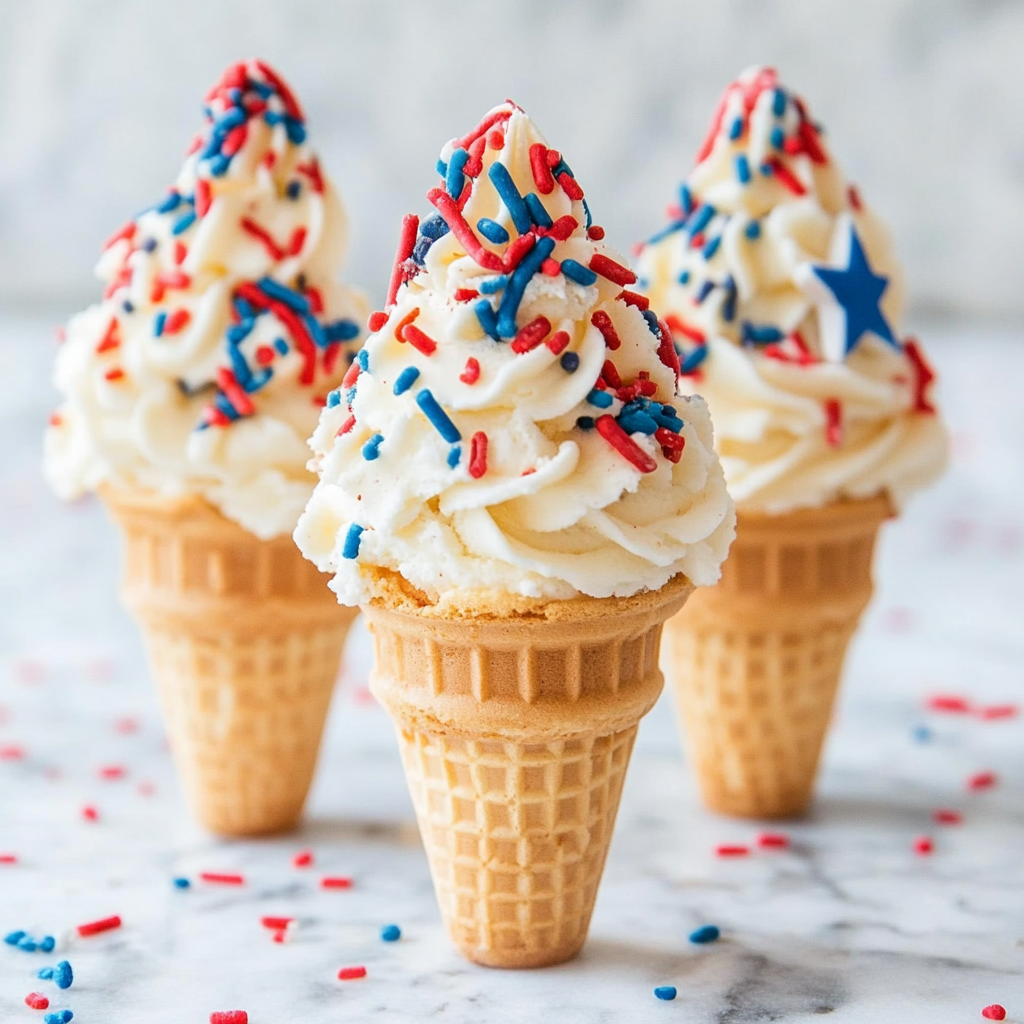
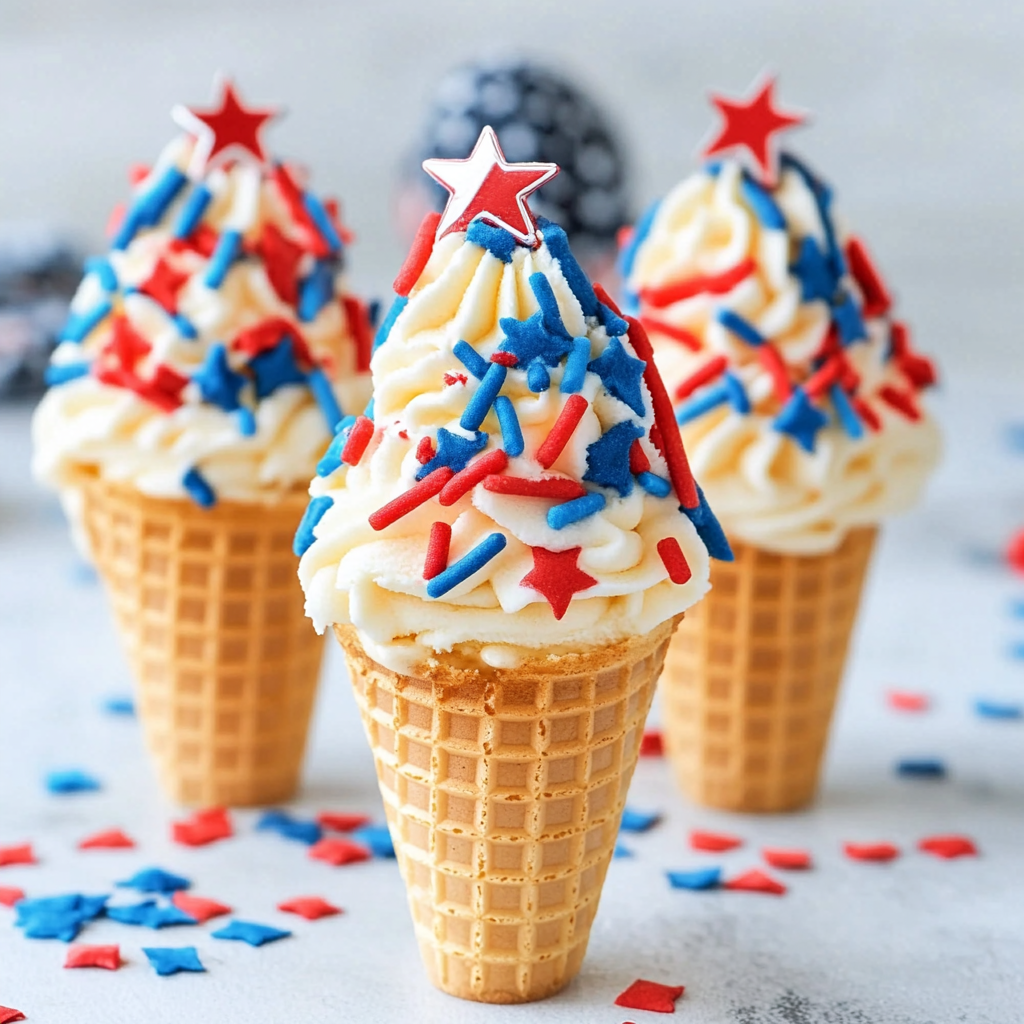
I am loving these DELICIOUS 4th of July Ice Cream Cones! They’re the PERFECT sweet treat this 4th of July when you add ice cream plus they’re super easy to make, my kids loved them! These festive ice cream cones are not only delightful in taste but also visually striking, making them an excellent choice for celebrations, picnics, and family gatherings.
Jump to:
- Why You’ll Love This Recipe
- Tools and Preparation
- Essential Tools and Equipment
- Importance of Each Tool
- Ingredients
- For the Cones
- For the Coating
- For Garnish
- How to Make 4th of July Ice Cream Cones
- Step 1: Melt the Chocolate
- Step 2: Dip the Sugar Cones
- Step 3: Add Sprinkles
- Step 4: Cool the Cones
- Step 5: Serve with Ice Cream
- How to Serve 4th of July Ice Cream Cones
- Festive Presentation
- Ice Cream Pairings
- Themed Toppings Bar
- Fun in a Cup
- How to Perfect 4th of July Ice Cream Cones
- Best Side Dishes for 4th of July Ice Cream Cones
- Common Mistakes to Avoid
- Refrigerator Storage
- Freezing 4th of July Ice Cream Cones
- Reheating 4th of July Ice Cream Cones
- Frequently Asked Questions
- What are the best ice cream flavors for 4th of July Ice Cream Cones?
- Can I use regular cones instead of sugar cones?
- How long do these ice cream cones last?
- Can I customize my 4th of July Ice Cream Cones?
- Are these cones suitable for parties?
- Final Thoughts
- 📖 Recipe Card
Why You’ll Love This Recipe
- Easy to Make: With just a few simple steps, these cones are quick to prepare, allowing you to enjoy more time with family and friends.
- Customizable: You can choose your favorite ice cream flavors and sprinkles, making each cone unique to your taste.
- Perfect for All Ages: Kids will love helping out in the kitchen while adults will appreciate the nostalgic charm of ice cream cones.
- Festive Presentation: The vibrant red and blue sprinkles create a fun and patriotic look that’s perfect for Independence Day celebrations.
- Delicious Flavor: The combination of crunchy sugar cones, creamy ice cream, and rich chocolate makes every bite a treat to savor.
Tools and Preparation
Before diving into this cheerful recipe, gather your tools to ensure a smooth process. Having everything ready will help you whip up these delightful 4th of July Ice Cream Cones in no time!
Essential Tools and Equipment
- Wilton Candy Maker (or a pot for melting chocolate)
- Baking sheet
- Parchment paper
Importance of Each Tool
- Wilton Candy Maker: This tool melts chocolate evenly, making it easy to dip the cones without mess.
- Baking Sheet: Ideal for cooling the dipped cones without sticking or toppling over.
- Parchment Paper: Prevents sticking and makes cleanup easier after dipping the sugar cones.
Ingredients
For the Cones
- 12 Sugar Cones Ice Cream Cones
For the Coating
- Wilton Candy Maker (Or you can melt in a pot if you choose)
For Garnish
- Sprinkles in both red and blue
How to Make 4th of July Ice Cream Cones
Step 1: Melt the Chocolate
- Use your Wilton Candy Maker or melt white chocolate in a pot over low heat until smooth.
Step 2: Dip the Sugar Cones
- Take each sugar cone and dip it into the melted white chocolate.
- Ensure that the entire rim is coated for maximum flavor.
Step 3: Add Sprinkles
- Immediately sprinkle red and blue sprinkles onto the chocolate-covered rim.
- Rotate gently to allow even coverage.
Step 4: Cool the Cones
- Place dipped cones upright on a baking sheet lined with parchment paper.
- Allow them to cool completely before stacking.
Step 5: Serve with Ice Cream
- Fill each decorated cone with your favorite red, white, and blue ice cream flavors.
- Enjoy immediately for best texture!
How to Serve 4th of July Ice Cream Cones
These 4th of July Ice Cream Cones not only taste great but also look festive. Here are some fun serving suggestions to make your dessert even more delightful.
Festive Presentation
- Use colorful paper plates that match the red, white, and blue theme for an eye-catching display.
- Add small American flags on top of each cone for a patriotic touch.
Ice Cream Pairings
- Vanilla Bean – The classic choice that lets the toppings shine.
- Strawberry Swirl – Adds a fruity flavor that complements the sprinkles beautifully.
Themed Toppings Bar
- Create a toppings station with various options like whipped cream, chocolate drizzle, and fruit slices.
- Let guests customize their cones for a fun interactive experience.
Fun in a Cup
- For those who prefer a cup over a cone, serve the ice cream in clear cups topped with sprinkles and whipped cream.
- This option is great for kids and makes it easy to enjoy without the mess.
How to Perfect 4th of July Ice Cream Cones
Making perfect 4th of July Ice Cream Cones is all about attention to detail. Here are some tips to elevate your dessert game.
- Use Quality Chocolate – A good melting chocolate will coat better and add richer flavor.
- Choose Fresh Sprinkles – Fresh sprinkles will have more vibrant colors and better texture.
- Cool Completely – Make sure the chocolate coating cools fully before stacking to avoid any mess.
- Layer Flavors – Consider layering different ice cream flavors in one cone for an exciting taste experience.
- Serve Immediately – Serve the cones right after making them to keep them crispy.
- Experiment with Sizes – Try using mini cones for smaller servings or as bite-sized treats.
Best Side Dishes for 4th of July Ice Cream Cones
Complementing your 4th of July Ice Cream Cones with delicious side dishes can enhance your celebration. Here are some ideas:
- Patriotic Fruit Salad – A colorful mix of strawberries, blueberries, and bananas tossed together.
- Grilled Corn on the Cob – Sweet corn grilled to perfection and topped with butter and seasonings.
- Red White and Blue Pasta Salad – Pasta mixed with cherry tomatoes, mozzarella balls, and fresh basil for a refreshing dish.
- Caprese Skewers – Cherry tomatoes, basil leaves, and mozzarella balls drizzled with balsamic glaze on skewers.
- Potato Salad – A creamy classic that pairs well with sweet desserts like ice cream cones.
- Veggie Platter with Dip – Colorful assorted veggies served with a zesty ranch dip provide a crunchy contrast.
Common Mistakes to Avoid
Making 4th of July Ice Cream Cones can be a fun experience, but there are some common mistakes to watch out for.
- Using the wrong chocolate: If you choose not to use a candy maker, ensure you melt the white chocolate properly. Overheating can ruin its texture. Use low heat and stir continuously.
- Not letting them cool: Failing to let the melted chocolate harden before stacking can result in a messy treat. Allow at least 10 minutes for cooling.
- Overloading with sprinkles: While sprinkles add fun, too many can overwhelm the cone and create a mess. Aim for a light sprinkle that enhances, rather than hides, the chocolate layer.
- Choosing improper ice cream flavors: Not all ice creams pair well with the festive theme. Opt for red, white, and blue flavors or classic vanilla to keep it patriotic.
- Ignoring proper storage: Storing these cones improperly can make them soggy. Use airtight containers and avoid stacking them immediately after decorating.
Refrigerator Storage
- Store in an airtight container.
- Best consumed within 2 days for optimal freshness.
Freezing 4th of July Ice Cream Cones
- Place in a freezer-safe container with parchment paper between layers.
- Can be frozen for up to one month.
Reheating 4th of July Ice Cream Cones
- Oven: Preheat to 350°F; place cones on a baking sheet for about 5 minutes to warm slightly.
- Microwave: Heat on low power for 10-15 seconds; do not overheat as this can melt your cone.
- Stovetop: Warm on low heat in a non-stick skillet for about 1 minute, turning gently.
Frequently Asked Questions
What are the best ice cream flavors for 4th of July Ice Cream Cones?
Vanilla is a great base because it pairs well with red and blue toppings. You might also try strawberry or blueberry flavors to enhance the patriotic theme.
Can I use regular cones instead of sugar cones?
Yes! While sugar cones add sweetness, regular cones will work just fine. Just keep in mind that the texture may differ slightly.
How long do these ice cream cones last?
If stored properly in an airtight container, they can last up to 2 days in the refrigerator or one month in the freezer.
Can I customize my 4th of July Ice Cream Cones?
Absolutely! Feel free to mix different sprinkles or add layers of fruit for extra flavor and color. Get creative!
Are these cones suitable for parties?
Definitely! They are easy to make and perfect for gatherings. Guests will love their festive look and delicious taste.
Final Thoughts
These 4th of July Ice Cream Cones are not only simple but also allow plenty of room for customization. Their festive appearance makes them ideal for any celebration. With options like different sprinkles or ice cream flavors, you can tailor them to your taste. Enjoy making this delightful dessert with family and friends!
Did You Enjoy Making This Recipe? Please rate this recipe with ⭐⭐⭐⭐⭐ or leave a comment.
📖 Recipe Card
Print
4th of July Ice Cream Cones
- Total Time: 0 hours
- Yield: Serves 12 cones 1x
Description
Elevate your 4th of July celebrations with these delightful 4th of July Ice Cream Cones! Perfectly festive, these cones feature a crunchy sugar base dipped in smooth white chocolate and sprinkled with vibrant red and blue sprinkles. Not only are they a treat for the taste buds, but they also add a burst of color to your holiday festivities. Easy to make and customizable for all ages, these ice cream cones become a fun project for the whole family. Fill them with your favorite ice cream flavors, and you have an irresistible dessert that’s bound to impress at any gathering.
Ingredients
- 12 Sugar Cones
- White Chocolate (for coating)
- Red Sprinkles
- Blue Sprinkles
Instructions
- Melt the white chocolate using a Wilton Candy Maker or on low heat in a pot until smooth.
- Dip each sugar cone into the melted chocolate, ensuring the rim is fully coated.
- Immediately sprinkle red and blue sprinkles onto the chocolate-covered rim, rotating gently for even coverage.
- Place the dipped cones upright on a baking sheet lined with parchment paper to cool completely.
- Once cooled, fill each cone with your choice of ice cream flavors and serve immediately.
- Prep Time: 15 minutes
- Cook Time: N/A
- Category: Dessert
- Method: N/A
- Cuisine: American
Nutrition
- Serving Size: 1 cone
- Calories: 210
- Sugar: 18g
- Sodium: 45mg
- Fat: 8g
- Saturated Fat: 5g
- Unsaturated Fat: 3g
- Trans Fat: 0g
- Carbohydrates: 33g
- Fiber: 1g
- Protein: 2g
- Cholesterol: 10mg